A New Year – A New Beginning!

The calm before the storm?

A step back before a big leap forward?

Slipped off the band wagon?


So many possible explanations for my 10 week hiatus from my weekly “Made-a-Move Monday” postings.  Maybe a little of each; maybe none.  Regardless, I am back with a renewed new commitment to go along with the start of the new year.

Over the past couple months I have made a switch – not a sudden shift, but one so gradual and nearly imperceivable that I am not quite sure how I got here.  But, here I am.  Where am I?  More connected to my family and on track to ‘re-become’ an occupational therapist.  [My blog - I can make up words if I want to :) ]  I am ready to let go of many of the things I have been doing and head in a new direction.  And what of my dreams?  They are still there, but with a new twist.  The projects I imagine making can be fun dreams and/ or hobbies to enjoy – either way is fine and goodAnd, the Creativity Center I really want – that is still my big goal – but now I want it run by an occupational therapist with the goal of providing personal fulfillment to those who come there…  an OT named me.

I am stepping into 2013 with finishing off my first 4 (of 43 needed) continuing ed contact hours and the first few pages read of the book I need to study for an oral exam.  Just as “Made-a-Move Mondays” got me moving each week in 2012 – I am now going to use this blog to keep me moving towards my goals in 2013 – not so much with boring details of my progress; but, hopefully, with nearly daily updates on my progress in the new goal progress bars I figured out how to add to my blog in the sidebar – Aren’t they great!?
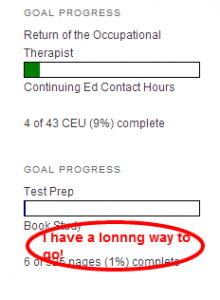
Have a goal you want to track on your blog?  Here’s where I got the simple plugin for adding them to mine and how to do it:

First download the plugin to your computer from the link below.  Then go into the Plugins menu of the WP Admin sidebar and chose to “Add New”.  From there, browse your computer files to add the plugin to My Widgets on WP.  To add the new plugin to your page, go to the “Appearance” option of the Admin sidebar to get to Widgets.  Find the newly added widget and drag it to the right to put in the  Main Sidebar of your page.  Once placed, you can customize the titles, size of bars, and the colors of the bar and fill color.  Click the Save button at the bottom and you are good to go!

Dave’s Whizmatronic Widgulating Calibrational Scribometer

I know there are fancier ones out there, but for my limited programming knowledge, simple is good!

This morning, one of the things I started 2013 with was viewing today’s “A Minute with Maxwell – Word of the Day” message from John Maxwell - “Beginning”.  He concluded his brief message with a quote I have heard him say before – “All’s well that begins well.”

Wishing you a very “Well” beginning to a great year… a wellness that grows in great, positive, happy and sweet ways throughout the year!  Happy New Year!

- DebBee

Made it myself

Made-a-move #32: Taking ideas and making them happen

Busy week with lots of accomplishments. But, as I am attempting to type this posting on a 7 inch tablet (for the 2nd attempt), while on a vacation, I will try to keep words brief.

Sorry for delay on pix for the post – I can say with confidence that I am not able to upload pictures from my 7″ tablet directly to my WordPress site – errrrr. 

Last week in brief…

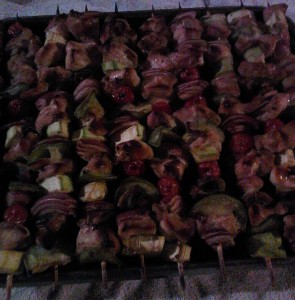
Saw a new recipe and tried it out – YUM!  Honey Chicken Kabobs – so easy and worth the time to string them (especially with the help of my DD!)


Prototype, testing, modifications, sample market testing, feedback and suggestions:

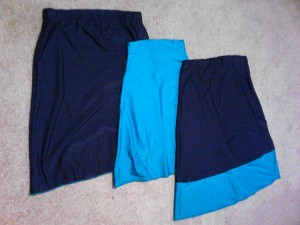
Swim skirts x 4 for trip (yes, I know only 3 of them are in the picture):

Great vacation with the family and DH’s mom, but…

… it’s good to be home.  I soooo needed a nap today!  at least my DS got a good rest in during the trip:

Keep moving!  Keep growing.

- DebBee

Pintrest

Made-a-move #27: better utilizing Pintrest

Pintrest… ohhh the potential!!

Several months ago, I overheard people in the real world and the blog-o-sphere mention Pintrest… and the danger of getting addicted to it.  I decided to try it out, I saw it’s amazing potential, and set up several boards.  But, up until now, haven’t put much time into them – some of them are even still empty.  So my move for this week was to start using them more.


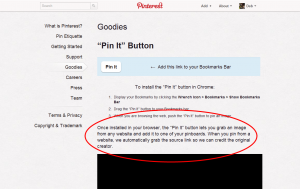
To do this, I used the “Pin It” button that I have attached to my bookmarks bar (Pintrest gives great instructions on how to get it there) to pin pictures from my HoneyTreeBuzz site and my DD’s online picture gallery of her artwork (much in need of updating) to my Pintrest boards.  Maybe I am jumping too far ahead.  For those who don’t know, here’s a basic low-down on Pintrest:  Imagine a big bulletin/ memo board that you pin your favorite recipes, dream home ideas, magazine picture clippings, inspirational quotes, etc to.  Things you don’t want to just lose in a drawer or stack somewhere.  This is great for you, but it can get rather disorganized after a while, so now you divide all of those things you “pinned” up on the board into separate boards for each category.  When friends come over, they see all of the great and inspirational things you have pinned up.  When they see something that you mutually appreciate, it creates a greater connection between you.  But how to share them with more of your friends?  What about sharing them with other people who would love them as well?  What about all of the great inspirational things you find on the internet?

This is where Pintrest comes in.  On one hand, it is an infinitely large memo board that everyone can “pin” things onto for others to see.  On another hand, it can be a not-so-huge memo board that just includes the newly “pinned’  things people with similar interests as you (which you have chosen to “follow”) have posted, and on another hand (didn’t you ask for a 3rd hand?) it is personal, online, memo boards for you to save pictures and links to the things you like – you set your own “board” categories and you choose what to “pin” to your virtual boards.

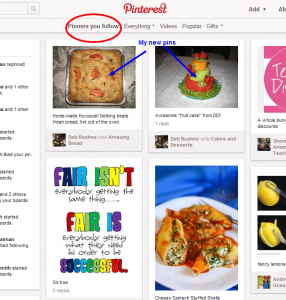
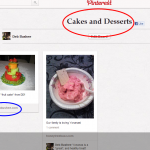
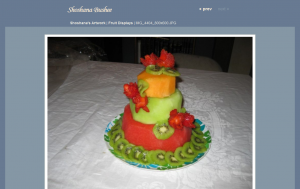
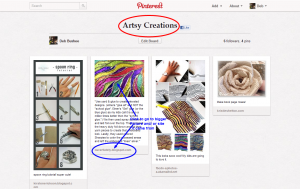
So when I chose to add a picture of the incredible “fruit cake” my DD made to one of my Pintrest boards, it showed up on 1) the main Pinterest board of “Everything” for everyone in Pinterest to be abe to see,  2) my Pinterest board of just the people I follow and want to see, and 3) on my “Cakes and Desserts” Pintrest board.  The few people who have chosen to “follow” my pins will also see this new “pin” of her cake when they log into Pinterest, too.   Now for the incredible potential part…  when I see a picture on Pinterest of an amazing looking food, I can click on the picture of it and usually be directed to the web site that describes how to make it.  When someone clicks on the picture (or URL link listed with it) of the Foccacia bread I pinned, they are sent to my HoneyTreeBuzz posting for how to make it!  When my DD is ready to sell her painted glassware, people will be able to click on pictures of it they like and be directed to the site that she is (or rather will be) selling them from.  And, for the fun part, whenever you come across something that you really like that someone else posted pinned, you can “re-pin” it, meaning attach that picture to one of your boards for you to refer back to and for you to be able to share with the friends that “follow” you – like these which I put on my “Artsy Creations” board:

Want to get started?  Go to www.pintrest.com and follow the directions to “request an invitation.”  They give great step-by-step directions to get set up and everything is very versatile to edit/ change your settings at any time.  Two warnings though: 1) Everyone has different interests and tastes, so on the everything section of what people post, there may be images that you don’t want your kids viewing (or maybe not even yourself); and 2) it is easy to get sucked into the “eye candy” of the fun stuff that is posted.  Happy pinning!

A new approach to Time (self) Management

Made-a-move #25:

tell your time

I’ve previously posted some great blogging tips I found at Blogging With Amy.  My move for this week was to read and start to apply her advice from her eBook Tell Your Time.  Yes, I actually started and finished, and started to apply a self-improvement book!  Ok, Amy Lynn Andrews made it doable by keeping her book short, to the point, and practical – all in about 30 pages.

Right from the beginning, she provided a very basic, and yet so profound, statement that made me stop and take notice of how off-track I have been:

How we live our days, of course, is how we live our lives.

- Annie Dillard

What an eye opener!  I live my days running around chasing my tail.  What I want is to be able to say I have/ had a good, happy and purposeful life.  Am I happy?  I have been too busy taking care of the responsibilities and people around me to even think of what that means, let alone, actually make an effort to be happy.  I feel happiness when the people around me are happy (especially my husband and children) and even more so when I have had a hand in doing something that helps them feel happy.  But, would I describe myself as being happy in general?  I pray daily for my children to grow strong and healthy in every way and have happy lives.  Am I really modeling that for them?  To be able to answer these questions the way I want to, I need to make changes!

I went through the first 60% of the book in 1 sitting.  By the next day, I found myself thinking about my approach to life in a very new way.  There has been a big disconnect between my approach to life (living in the here and now, doing the best that I can with what I have) and the dreams I have for what I want to do in my future.  This book shed light on a basic recognition and system for connecting up what I do with where I want to go.

In her book, Amy proposes looking at time similar to looking at finances (something else I have not been very good at).  We have a finite amount of time.  Everything we need to do and want to do has to fit into the limited amount of time we have.  When we “spend” too much time on one thing, or get distracted into “spending” time on something mindless, that leaves less time to do the other things in our day… and our life.  Managing time can be looked at just like people who use an envelop system to budget their finances, dividing up their available money into separate envelopes for their different expenses.  They soon realize that to spend extra $ on one category after the envelop is empty, they have to “take” $ away from something else.  If we don’t “budget” any time for taking steps to reach our dreams, we aren’t going to get there.

As I am presently “spending” part of my time allotment that should be used for sleep, I will end this post with a high recommendation for the Tell Your Time book and an eagerness to finish developing (tomorrow) the schedule it is guiding me to create.

Wishing much success and happiness to you, in your days and life!

************************************************************************************

PS.  My links to Amy’s site in this posting are now “Affiliate Links” – I did not write this post to get paid for promoting her book, but rather learned how to make an affiliate link (from “Blogging with Amy“) after writing it.  More on that to come…

LegoFest

Made-a-move #24 – Being a catalyst for change with a positive mindset

My sons love Legos.  I amazes me that with the quantity they have they are continually looking to buy more sets.  Few things can bring excitement to their eyes like their grandmother landing a great deal on masses of Legos from a rummage sale.

So, when LegoFest came to our area the same week as DS #1′s Birthday, buying tickets was pretty much a necessity (though I did try to keep it a surprise until he saw the tickets hanging in my bedroom – carefully placed so I wouldn’t forget where I put them).  As the tickets were pricey, I only purchased enough for 1 adult and 2 kids.  Being Father’s Day, I figured it was best making it a father-son outing.  So, my move for this week was sending my husband out with healthy food for the road and healthy advice – to set aside all of the the things that weigh on his mind continuously and, instead, focus on having fun with his sons on Father’s Day.

He took my advice and did.  His reflection on the experience is dominated by the extreme happiness and smiles he observed on his sons’ faces.

From seeing incredible displays… to getting up close to incredible Lego structures… to tromping through calf-high piled Legos… to building and racing vehicles down a ramp… to observing a Lego bridge endurance test… to building Wisconsin-themed creations (beer mug and bowling lane) to include in a floor “map” of the United States… to purchasing Lego sets at a great price (with their own $!), they had a great time.  Together!

My DH was sure to have a picture to show that he took my advice to heart:


Being Father’s Day, I did my part of the day back home – I made home-made pizza to have ready for their return and I told our 4 y/o DS it was Father’s Day – to which news he promptly made gifts for his “Abba” – complete with lots of hearts.

Small actions on my part were a catalyst for such wonderful positive experiences for my family!  The results were topped off by the special hug I got from DS #1 before he went to bed.

How beautiful the flowers grow with a gentle wind to blow away the clouds and let the sun shine through!


Bananas for Yonanas

Made-a-move Monday #23:  Buy food on sale, freeze extras for future

A few months ago we bought a *Great* new kitchen gadget – a Yonanas machine.

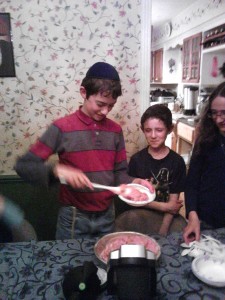
We made some up for my oldest DS’s birthday Monday night – a great refreshing treat on a hot day… especially when the A/C is on the fritz.

So what is so great about this treat?

It is all fruit! No sugar added! No dairy.

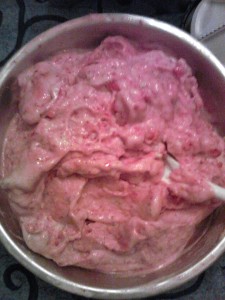
And it has the consistency of soft served ice cream!  My DH is amazed by the fact that the fruit becomes so much like ice cream that it even melts!   Here’s the scoop on it…

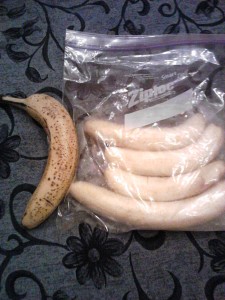
First you peel and freeze bananas after they start to turn brown; Cheetah-spotted Bananas as the Yonanas directions put it.  This is where my “Move” for this past week comes in … I bought a lot of bananas when they were on sale last week and froze all of the extras when they became well spotted.  No over-ripe bananas in the garbage!!

The bananas need to be well frozen as they are what give the finished treat the right texture.  At least overnight is best.

Also have on hand other frozen fruit – either store-bought or frozen yourself (oops, I missed my chance to freeze the extra strawberries in time)

The Yonanas is made by alternatingly putting the frozen bananas (thawed 5 min) and other fruit (thawed approx. 20 min.) into the machine.  The machine grinds the fruit and sends it out a spout as you go.  It only takes a few minutes!  After it comes out, you mix the ingredients together and it is ready to serve.  Clean up is very easy – there are only 5 parts to clean up which are very easy to assemble and disassemble.  The machine came with a recipe book with a variety of dessert ideas we are looking forward to trying out.

Have a great, sweet and successful week!

photo.JPG

Drop-Down Menus!!

Made-a-move #15

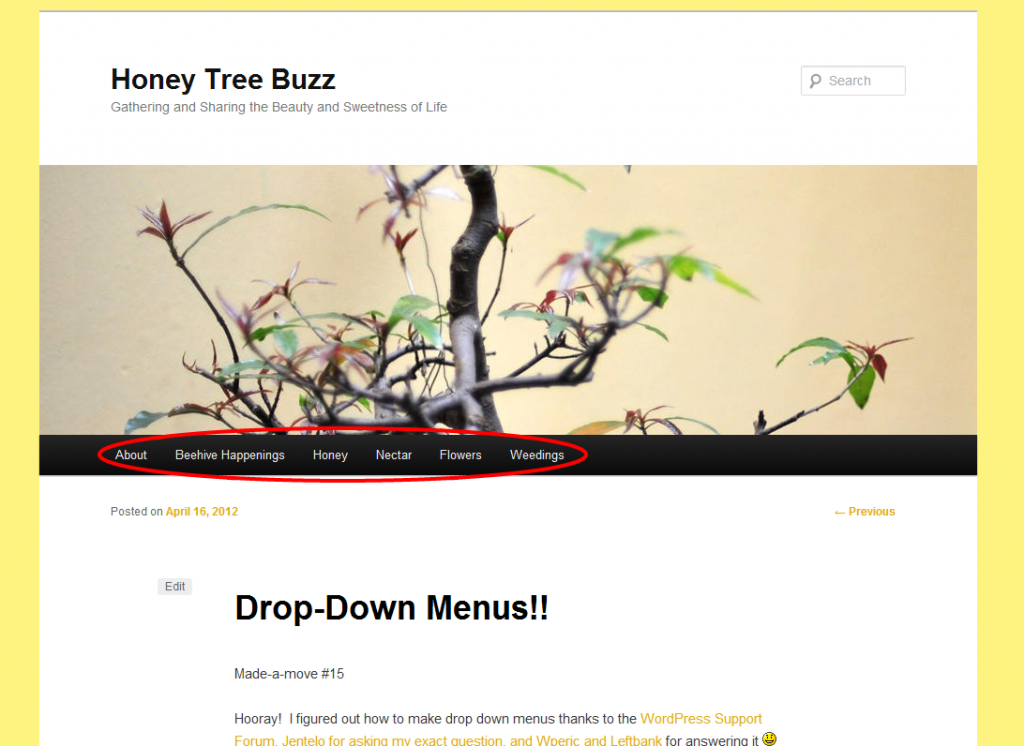
Hooray!  I figured out how to make drop down menus thanks to the WordPress Support Forum, Jentelo for asking my exact question, and wperic and leftbank for answering it :)

My crazy menu titles now have meaning when “moused-over” :)

If you are just starting out, here’s how – or at least how I did it:

First off,  I am using the WordPress theme Twenty Eleven.  I don’t know what the different layouts may be if you are using a different WordPress theme.

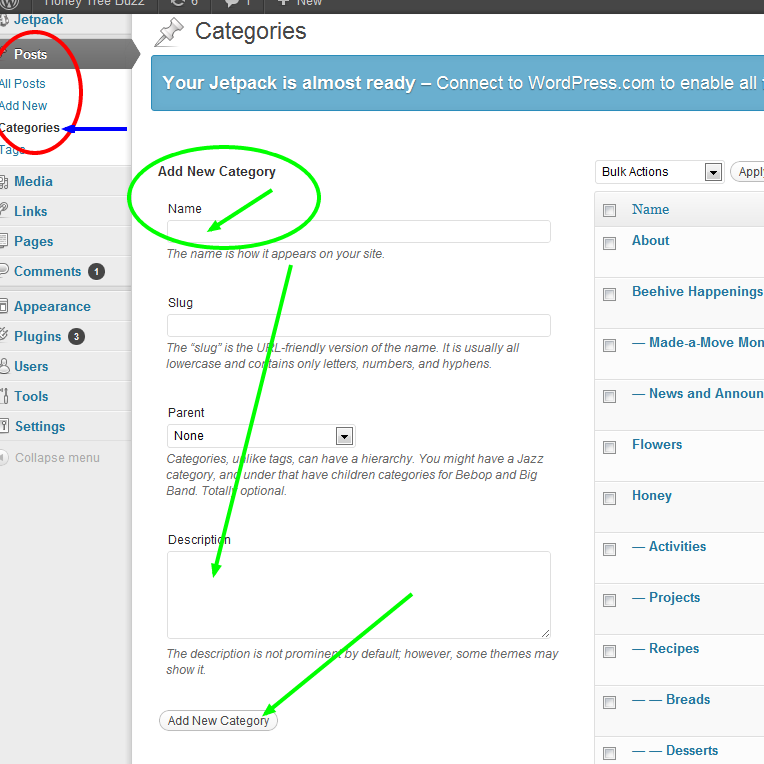
When I decided to set up my blog, I had ideas of what content I wanted to include and an outline of how I would organize the content.  So, I first set up the different categories that my postings would fit into.  As I make a posting, I label it with the category I already have set up.  Accessing “Categories” is found in the “Posts” option in the WordPress left sidebar of the admin control pages.  Once on the Categories page, setting up your categories is as easy as inputting the Name, a description (optional), and press “Add new Category” – see green arrows below:

If you input your main categories first, you can later assign the other categories you set up as being subcategories to a “Parent” while you are inputting them by clicking the “Parent” drop-down before clicking “Add New Category”.  You can always assign or change the categories later by going to the Categories page in the Posts sidebar option and Edit the one(s) you want to.

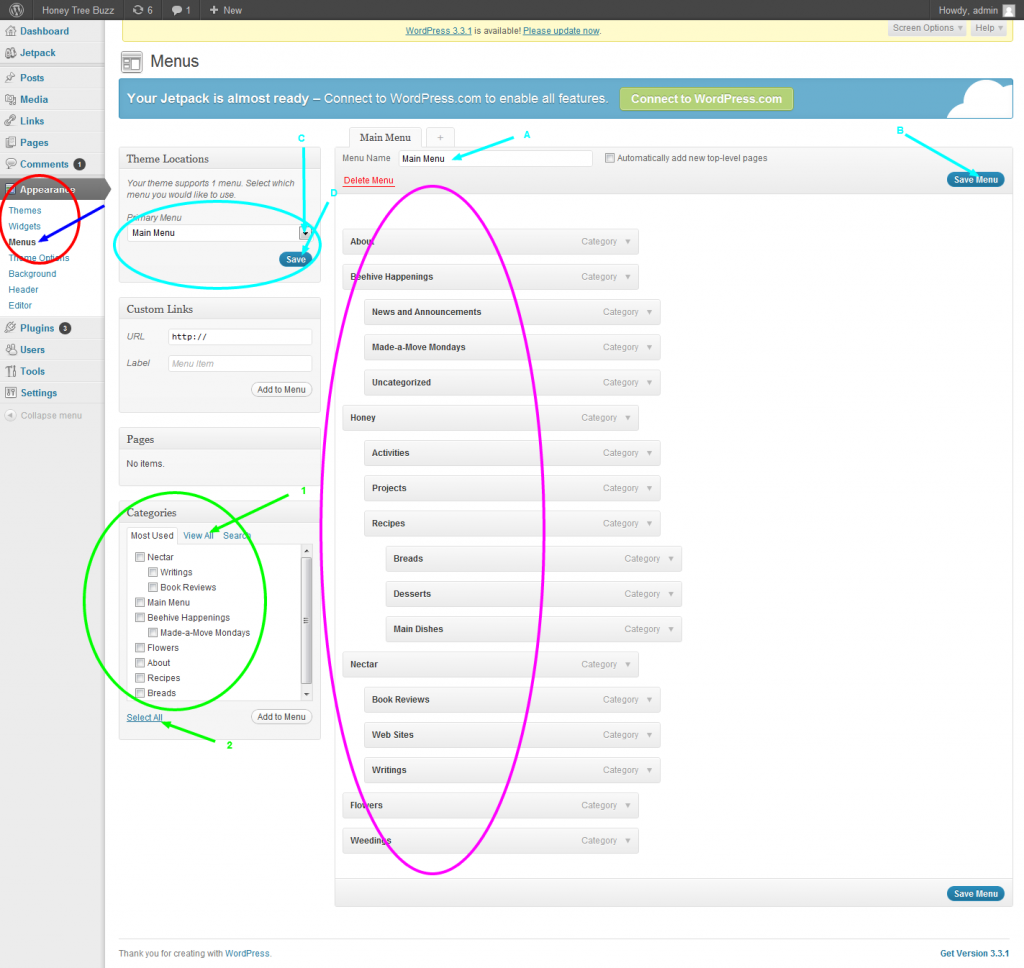
Having categories for your posts is not the same as having menu titles across the top of your page yet.  To set up your menu bar, look at the sidebar  and find “Appearance”.  In the Appearance options, go to Menus (red circle below.)

At the blue arrows below, input A the menu title (you can create different menus, but WP Twenty Eleven theme only has one location for a customized menu so you will only use 1 menu at a time); B save the menu title, C choose the menu you want to use, and D click Save.  You now have a menu – next to add the Menu titles.

Towards the bottom of the Menu page are the categories that are set up.  The default is to show the Most Used, but clicking the View All (green arrow 1) is more useful.  You can pick-and-choose the categories you want in your menu or you can choose to Select All (green arrow 2).  Next, click Add to Menu – this will make them show up in the menu list shown below in the purple circle.  At this point they will be all aligned along the left edge of the menu list.  Be sure to Save Menu by clicking the button in the bottom right!

Rather than having so many menu items across your menu bar, you can make some of them be sub-topics that will show up as drop-down when mousing-over the “parent” categories that will be in the menu bar.  To do this, drag and drop the sub-menu item below, and slightly to the right, under the menu topic you want it to be in.  The final look is what you see in the purple circle above.  Be sure to click Save Menu (bottom right) when you are done!

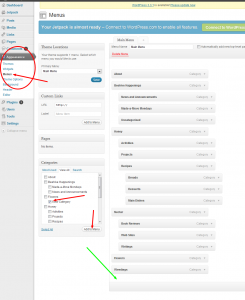
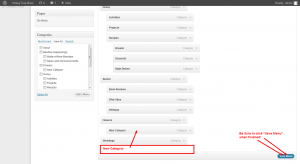
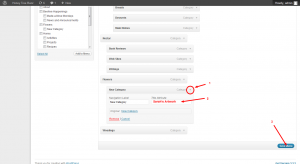
At any time in the development of your blog you can add additional categories using the same process above.  Under Posts, go to Categories and add the New Category.  Then, under Appearance, go to Menus and, in the View All listing, click the category you want to add to your menu (see left image below).  When you click Add to Menu, it will add it (where the green arrow points) at the end of the menu list.  Simply drag-an-drop it to where you want it to go (right image below). Again, be sure to Save Menu when finished.


But, there’s more…

You also have the option to add descriptions of your menu item that will be visible when the mouse lingers over that item.  To do this, click the little arrow next to the menu category (point 1 in red circle) and then type the descriptive Title Attribute in box at the arrow 2.  Be sure to Save Menu when finished (arrow 3)

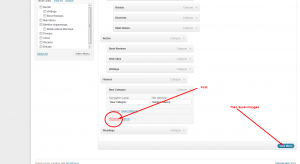
If you later decide to get rid of a category in your menu, you can do that through that menu item’s Category drop down arrow (see below).

If rather than just deleting the menu item, you choose to delete a category all together on the Categories page, any postings you had in that category that do not have any other labels would be transferred to “Uncatagorized”.

Thank you for coming to my HoneyTree Buzz Blog – much success to you in the growth of yours!

- DebBee

Cakes

Made-a-move #9

Oops – I was so excited about my oldest son coming home from a 2 week long trip to Israel on Monday that I forgot to post my move for last week… cakes.

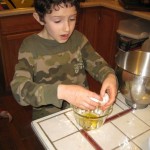
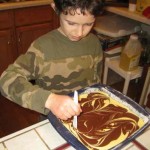
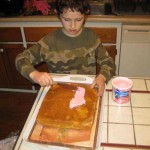
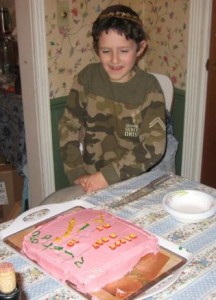
In putting together a happy birthday sign for my middle son I came across pictures of how determined he was to make his own cake last year. So after school, the day of his birthday, I helped him make his own cake and decorate it his own way.

Strawberry - Yum! Who cares if its pink?!


Sunday was my turn to decorate cakes my way for a special event at the preschool of my youngest son, where I work.
Making and decorating cakes can bring so much happiness to so many people!

More moves to come.

Tablet Case

Made-a-Move Monday #8

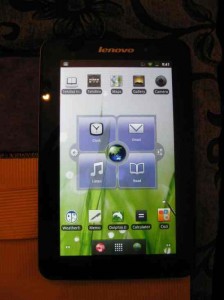
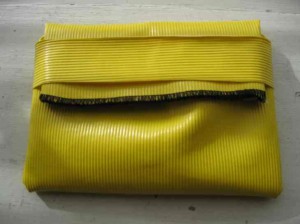
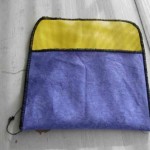
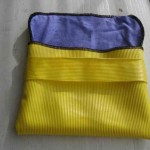
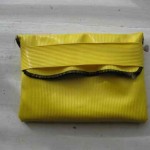
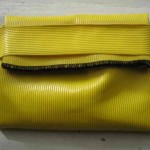
My DH just surprised me last week with a 7″ Lenovo Tablet and it is GREAT!   He was determined that I needed an upgrade in the “technology department” to be more efficient, as I continue to lug around my 17″ lap top and regular cell phone which I’ve had for nearly 5 years.  This thing is awesome!  So, rather than put “make a case” on my to-do list, first thing the next morning (after getting all the kids out the door for school), I pulled out my serger sewing machine, picked out some scrap fabrics and Made a Move… I mean made a Tablet Case.  I was in a time crunch to get to work, so not perfect, but DONE.  (Touch-ups can come later…maybe)

Very simple – you can do it with a regular sewing machine.  Want to try?  You can adjust the size of the fabrics depending on the size you want and how much additional space you want inside for padding, etc.  If you are using a regular sewing machine, you may want to adjust directions to hide seems inside.

Here’s how I did it:

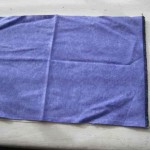
The first fabric I picked was 9″ x 16″ of flannel.  Great size and color, but slippery and not much protection.  Then I found this great vinyl fabric remnant that is soft on the inside, water repellent on the outside and bright yellow (ie. bright, cheerful & easy to find… now where did I put that grocery list?).

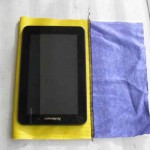
Cut vinyl to same size as flannel and cut a strip of vinyl approximately 1 1/2″ wide x the width of the short side of the fabrics.  Next, serge large fabrics together at one short end, wrong sides together.

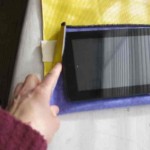
Use the tablet to determine right size of the case.  Fold fabrics with flannel side facing out/ vinyl side together.  Place the 1 1/2″ strip (wrong side facing shorter side of case) across the vinyl side of the attached fabrics approximately 1″ from lower edge. (Can use a little tape to hold in place away from where stitches will go, but I was in a hurry so I just held it).


Starting at the lower corner where fold of fabrics meet the side, serge up to top, curve around corner, across top, curve out other top corner, and then down to bottom corner on other side of case.  Knot string ends and trim. (Can add a dab of Fray Stop liquid to keep threads from coming loose.)

Turn case right-side-out, being sure to keep added strip on the shorter side of case.  My case was a little roomy, so I was able to slide in some thin padding to add additional protection for my tablet.  You can make yours as tight a fit as you would like.

When closed, the top buckled a little. I plan to serge off a bit of the extra on the sides of the upper flap, but in the mean time it works fine to just fold them under as I slide the flap under the strap.

So, where are those grocery and ‘to-do’ lists?  On my family’s online Cozi calendar and in the Memo app I added to my new Tablet :)

Huge Thank Yous to my DH – that is “Dear Husband” not “designated hitter” in case you are reading this ;)

…for the tablet & setting it up for me, for all you do for our family & others, for your encouragement & support, and for the memo you added to my memo list :)


Easy Oven BBQ Chicken

Made-a-Move Monday # 7

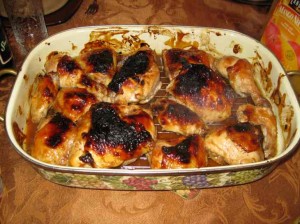
Making BBQ chicken inside, using a regular oven, may not be as fun as doing it outside on a grill, but it can be easy and very delicious.  So, if cold, rain, mosquitoes, lack of charcoal or just lack of time is spoiling your craving for BBQ chicken, you may want to give this simple recipe a try.

Ingredients:

Chicken pieces as desired (ie in 8ths, leg quarters, etc)

BBQ Sauce (I like Kraft Original)

Honey

In a large bowl, mix 3 parts BBQ sauce with 1 part honey (approximately 1 cup of BBQ sauce plus 1/3 cup honey for 1 whole chicken cut in 8ths) – adjust to taste.

Wash chicken pieces, shake off water and put in bowl of sauce mixture.  Turn pieces until all chicken pieces are evenly coated with the BBQ/ Honey sauce.  If desired, you can let marinate approximately 1 – 2 hours, but this is optional.

Turn oven on to “Broil” setting.  Place chicken pieces on rack in broiler pan with skin side down.  Put on high shelf of oven and broil for 15 – 20 minutes until darkened as desired.  Turn chicken pieces so skin side is up.  Using basting brush (I like silicone), brush extra BBQ/ Honey sauce on top of chicken.  Return to broiler for another 15 – 20 minutes until darkened as desired.  Remove chicken pan from oven and cover with foil, change oven setting to “Bake” at 375 deg. F, and return covered chicken to oven for approximately 35 – 45 minutes.  Cut into chicken to check if done – actual times may vary depending on oven.

Enjoy!