Cakes

Made-a-move #9

Oops – I was so excited about my oldest son coming home from a 2 week long trip to Israel on Monday that I forgot to post my move for last week… cakes.

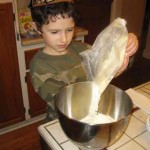
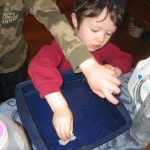
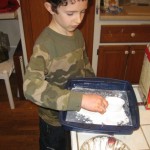
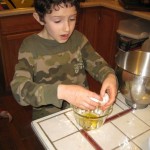
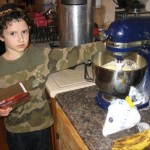
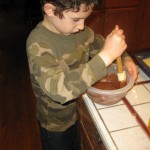
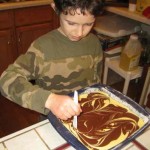
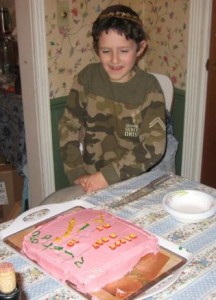
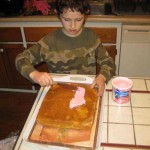
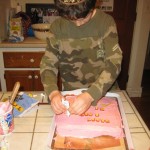
In putting together a happy birthday sign for my middle son I came across pictures of how determined he was to make his own cake last year. So after school, the day of his birthday, I helped him make his own cake and decorate it his own way.

Strawberry - Yum! Who cares if its pink?!


Sunday was my turn to decorate cakes my way for a special event at the preschool of my youngest son, where I work.
Making and decorating cakes can bring so much happiness to so many people!

More moves to come.

Tablet Case

Made-a-Move Monday #8

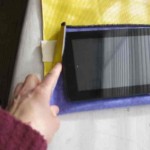
My DH just surprised me last week with a 7″ Lenovo Tablet and it is GREAT!   He was determined that I needed an upgrade in the “technology department” to be more efficient, as I continue to lug around my 17″ lap top and regular cell phone which I’ve had for nearly 5 years.  This thing is awesome!  So, rather than put “make a case” on my to-do list, first thing the next morning (after getting all the kids out the door for school), I pulled out my serger sewing machine, picked out some scrap fabrics and Made a Move… I mean made a Tablet Case.  I was in a time crunch to get to work, so not perfect, but DONE.  (Touch-ups can come later…maybe)
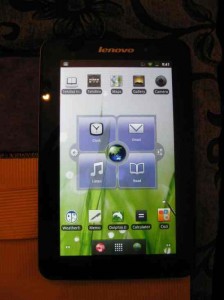
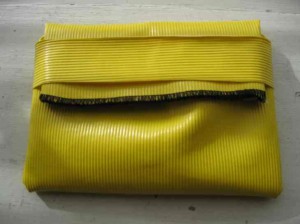
Very simple – you can do it with a regular sewing machine.  Want to try?  You can adjust the size of the fabrics depending on the size you want and how much additional space you want inside for padding, etc.  If you are using a regular sewing machine, you may want to adjust directions to hide seems inside.

Here’s how I did it:

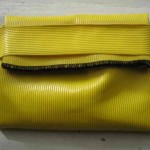
The first fabric I picked was 9″ x 16″ of flannel.  Great size and color, but slippery and not much protection.  Then I found this great vinyl fabric remnant that is soft on the inside, water repellent on the outside and bright yellow (ie. bright, cheerful & easy to find… now where did I put that grocery list?).
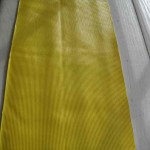
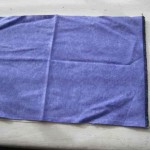
Cut vinyl to same size as flannel and cut a strip of vinyl approximately 1 1/2″ wide x the width of the short side of the fabrics.  Next, serge large fabrics together at one short end, wrong sides together.

Use the tablet to determine right size of the case.  Fold fabrics with flannel side facing out/ vinyl side together.  Place the 1 1/2″ strip (wrong side facing shorter side of case) across the vinyl side of the attached fabrics approximately 1″ from lower edge. (Can use a little tape to hold in place away from where stitches will go, but I was in a hurry so I just held it).
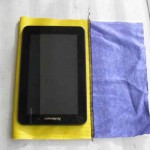
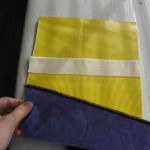


Starting at the lower corner where fold of fabrics meet the side, serge up to top, curve around corner, across top, curve out other top corner, and then down to bottom corner on other side of case.  Knot string ends and trim. (Can add a dab of Fray Stop liquid to keep threads from coming loose.)
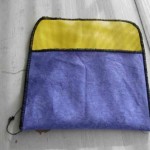
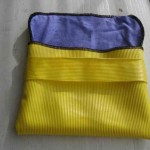
Turn case right-side-out, being sure to keep added strip on the shorter side of case.  My case was a little roomy, so I was able to slide in some thin padding to add additional protection for my tablet.  You can make yours as tight a fit as you would like.
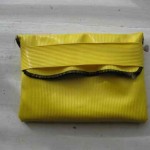
When closed, the top buckled a little. I plan to serge off a bit of the extra on the sides of the upper flap, but in the mean time it works fine to just fold them under as I slide the flap under the strap.

So, where are those grocery and ‘to-do’ lists?  On my family’s online Cozi calendar and in the Memo app I added to my new Tablet :)

Huge Thank Yous to my DH – that is “Dear Husband” not “designated hitter” in case you are reading this ;)

…for the tablet & setting it up for me, for all you do for our family & others, for your encouragement & support, and for the memo you added to my memo list :)


Easy Oven BBQ Chicken

Made-a-Move Monday # 7

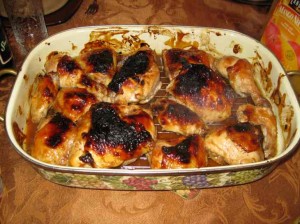
Making BBQ chicken inside, using a regular oven, may not be as fun as doing it outside on a grill, but it can be easy and very delicious.  So, if cold, rain, mosquitoes, lack of charcoal or just lack of time is spoiling your craving for BBQ chicken, you may want to give this simple recipe a try.

Ingredients:

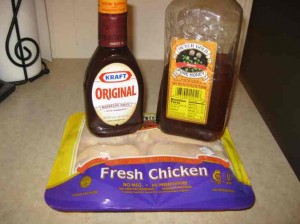
Chicken pieces as desired (ie in 8ths, leg quarters, etc)

BBQ Sauce (I like Kraft Original)

Honey

In a large bowl, mix 3 parts BBQ sauce with 1 part honey (approximately 1 cup of BBQ sauce plus 1/3 cup honey for 1 whole chicken cut in 8ths) – adjust to taste.

Wash chicken pieces, shake off water and put in bowl of sauce mixture.  Turn pieces until all chicken pieces are evenly coated with the BBQ/ Honey sauce.  If desired, you can let marinate approximately 1 – 2 hours, but this is optional.

Turn oven on to “Broil” setting.  Place chicken pieces on rack in broiler pan with skin side down.  Put on high shelf of oven and broil for 15 – 20 minutes until darkened as desired.  Turn chicken pieces so skin side is up.  Using basting brush (I like silicone), brush extra BBQ/ Honey sauce on top of chicken.  Return to broiler for another 15 – 20 minutes until darkened as desired.  Remove chicken pan from oven and cover with foil, change oven setting to “Bake” at 375 deg. F, and return covered chicken to oven for approximately 35 – 45 minutes.  Cut into chicken to check if done – actual times may vary depending on oven.

Enjoy!

Made-a-Move Monday #6

Yes, I “made a move” this week – and here it is.

Isn’t it amazing how several hours of work could end up looking like not much accomplished.  Kind of like when a husband comes home, sees a mess in the house,  and wonders what his wife did all day while he was busy working.  It is all of those behind-the-scenes little accomplishments that make the big show a success.

My blog was initially set up by my DH.  Now that I have a number of postings, I finally dug in to WordPress to figure out how to take it to the next level.  So, here is a glimpse into my hidden accomplishments:

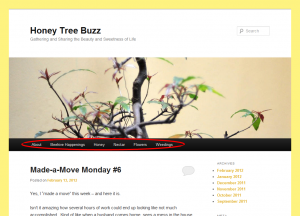
  • The HoneyTreeBuzz now has a menu – not quite as functional as I intended as I made an incorrect assumption that the menu items would display in drop-downs  (my tech savy DH is planning on helping me change the “Theme” to one that will give me more versatility on that)
  • All of the HoneyTreeBuzz postings have categories and content for each category is planned out
  • Followed BloggingWithAmy’s advice on how to install and use a screenshot capture tool

More moves to come.

- DebBee

My Shiny Sink

Made-a-Move Monday #5

Like puzzle pieces coming together, my brain made a switch this week.  Little messages have been seeping in and resulted in my making a switch from past habits to now starting to take care of things to completion better – not leaving dishes, papers, etc. in my wake to take care of later.

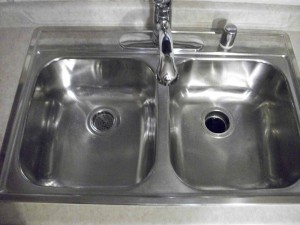
My tangible move for this week is a decluttered living room that has stayed that way for 3 days!, kitchen and dining room floors washed, dishes washed after dinner meals 4 nights in a row, and… a Shiny Sink!!

I shined my sink today!

Those familiar with The Flylady will understand the full significance of my shiny sink.  In short, “the Flylady” has great advice for getting people to change their disorganized habits, get into healthy routines, learn to love and care for themselves and their homes – all with small steps.  And it all starts with a shiny sink.  For the past several years, I’ve been running around so busily the clutter in my house and brain has grown to suffocating proportions.  My rut was too deep to even think about trying to jump back on to Flylady’s wagon.

So what were the messages that came together this week?

  1. I work at a school that follows a Reggio Emilia philosophy and emphasizes the importance of recognizing that children are competent.  Adopting this philosophy is viewed as being on a journey.  Rather than feeling guilty for not doing things perfectly (one of my downfalls) the staff are reminded that we are all on a journey and we are growing with all experiences, including the ones that don’t go as we would have liked.  Everything is positive in this light.  Rather than being paralyzed living in regrets and dealing with things from the past that were left unfinished, I can start fresh and move on with the here and now.
  2. Make-a-move.  Do.  Weekly postings of concrete “doings.”
  3. “Life is short” – we need to make good use of the time we have (from A Short Guide to a Happy Life, by Anna Quindlen)
  4. Really, I used to be an organized person.  Rather than just looking at WHY I and my things have become so disorganized (6 kids, house, job, husband, too much stuff, no funds to hire help, overtired …..), I stopped and asked WHAT is stopping me from being organized?  WHAT is stopping me from cleaning my house?  Somehow, asking these questions gave me the reins to take control of my life.
  5. Guests were coming (Friday night) – Done with CHAOS (Can’t Have Anyone Over Syndrome – a Flylady acronym)
  6. Listening to the music I loved listening to 25 years ago, when l was as I would like to be – happy, confident, high on life, able to focus, accomplishing, etc.

I’m sure there were other puzzle pieces that helped with my brain switch.  But, I am just happy that things are coming together and am excited to see where my journey is going as I continue to be committed to Make-a-Move.

Painting Stones

Made-a-Move Monday #4

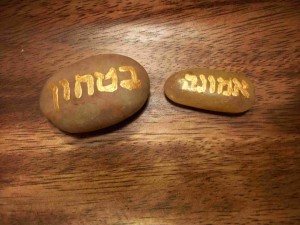
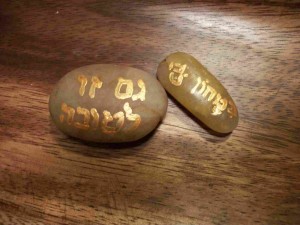
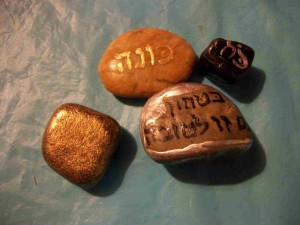
While my daughter moves along with painting glassware, I made my move in painting inspirational words and phrases on stones.

Two sides to one coin, as it were, but slightly different concepts Bitachon is the Hebrew word for a deep trust in the creator and Emmuna is translated more as faith.

The phrase below, Gam Zu L’tova, means “This also is for good”, which is connected to the concept of trust, Bitachon.

More on these to be added soon.

Practice

Made-a-Move Monday #3

As the old saying goes… practice makes perfect.

A well known phrase – so why is it so easily forgotten?

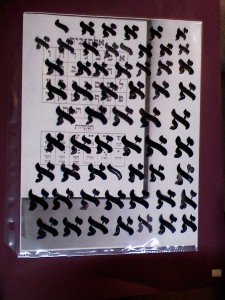
My “Move” this week was to start practicing.  As usual, getting myself to buckle down and do it was the main hurdle.  In my mind, I picture myself incorporating Hebrew and English letters and words into various things I want to make.  So much easier in my mind than in action – my writing Hebrew letters is painstakingly slow.  Somehow in my 40-something year old brain I forgot about practicing.

So, today, I started with the letter Aleph – the first letter of the Hebrew alphabet and a letter that has a numerical value of 1.  A great starting place for step number 1 :)   This letter is rich with deep meanings… but more about that in the future.

Drawing the alephs brought back memories of practicing…. practicing letters and penmanship, practicing cursive italics with pen and ink, practicing flute, practicing math problems.  As I practiced painting א, I realized that skills that I admire in others don’t flow from me more out of lack of practice than out of lack of talent.  If I could spend more time engaging in and practicing the things I like, I know I could be very successful in them!

I think this is, in many cases, the division point between children learning a new skill and adults.  Children are taught and expected to spend time “practicing”.  Adults don’t need any less practice for developing skills, they just have other expectations and responsibilities to attend to that tend to decrease ability to put time and attention into “just practicing”.  So many of us have this inner drive to constantly be accomplishing something all of the time, that it is difficult to take a step back and do remedial practicing.

So, while my “big move” for this week may seem like a very small thing (especially for an adult), I am eager to see where starting to practice will take me.

Moving along with Made-a-Move Mondays

- DebBee


Fantastic Foccacia Bread

Made-a-Move Monday #2

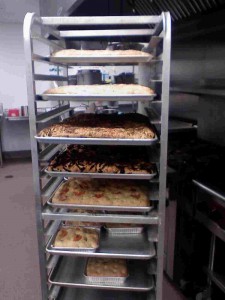
This week I made Foccacia bread, per special request, for an event with over 100 participants.

As I want to do and give my best, I am posting my Foccacia recipe (on a more normal scale) here to share with you.  It takes a bit of work, but is soooooo worth it!!  Make a move to try it and Enjoy!

Equipment needed:

Stand mixer with paddle attachment, dough hook optional

Ingredients:

  • 2 cups warm water (about 105 deg F)
  • 2 envelopes (4.5 teasp) active dry yeast
  • 1 Tbs sugar
  • 1/4 cup olive oil
  • 1/2 cup canola oil (or other oil of your choice)
  • 1 tsp. salt
  • 1/4 cup Italian seasoning
  • 1 Tbs crushed/ finely minced fresh garlic
  • 5 1/2 – 6 cups unbleached flour
  • Toppings of your choice (ie, Coarse Kosher Salt, crushed rosemary, sliced tomatoes, fresh garlic cloves, chopped red onion, pesto….etc.)

Directions:

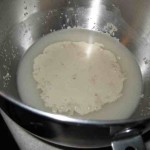
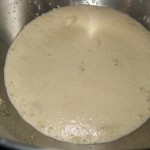
In mixer bowl, dissolve yeast and sugar in warm water and allow to proof (let it sit for 5 – 10 min).  Add olive oil, canola oil, salt, Italian seasoning, and garlic.  With paddle attachment, mix in 3 cups of flour – start at slowest speed and then increase mixer speed to medium to whip the dough until it begins to leave the sides of mixer bowl (approximately 7 – 10 min.)

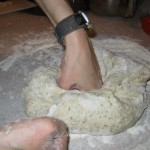
Mix in 2 1/2 cups flour by hand or with a dough hook and knead until smooth.

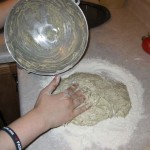
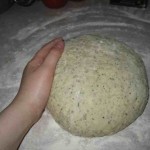
Dough should be soft but not too sticky.  If sticky, knead a little more flour in.  Allow dough to rise until doubled in size either on lightly floured counter with large inverted bowl over it or in large bowl, covered (with plastic wrap or damp tight-woven towel) to keep dough from drying out.  Rising time will depend on warmth of location (approx 30 min to 1 hour).  If using regular active dry yeast (instead of quick rise), punch dough down and allow to rise again.

Divide dough to size desired (see below) and either roll flat with rolling pin or press out flat with hands to shape of pan.

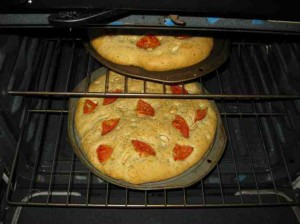
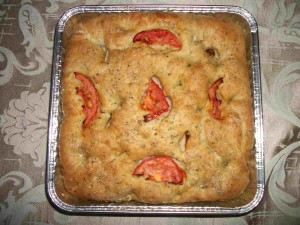
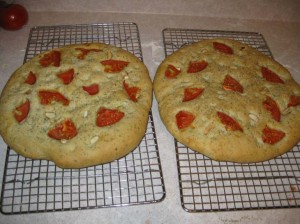
Prepare pans by oiling them.  This recipe is enough for two 13 inch pizza pans.  Type of pan is up to you – the picture below is an 8″ square pan with just over 1 pound of dough (recipe would fill 3 of these pans).

Allow dough to rise in pans approximately 30 minutes (again loosely covered in plastic wrap to prevent drying – can oil the plastic wrap to prevent sticking).

Toppings: Put toppings on dough either before or after rising in pans (I do it after).

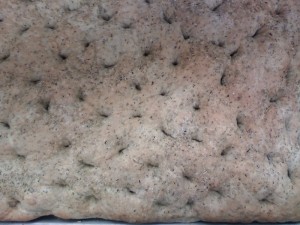
“Plain” Foccacia: First I lightly rub a little olive oil over top of bread dough. Sprinkle a little Coarse Kosher Salt and Crushed rosemary on top.  Using 2 – 3 finger tips, poke lots of ‘dents’ downward in dough.


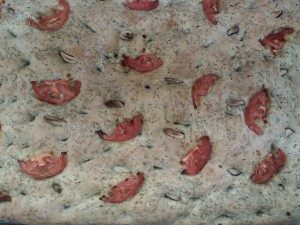
Garlic/ Tomato Foccacia: First I lightly rub a little olive oil over top of bread dough. Sprinkle a little Coarse Kosher Salt and Crushed rosemary on top.  Press fresh garlic cloves (cut in approximately halves depending on size of each clove) down into dough.  Press thin slices of tomatoes onto dough.  Using 2 – 3 finger tips, poke lots of ‘dents’ downward in dough.

Other topping ideas:  Diced red onion, basil, thinly sliced and/ or roasted peppers, pesto, olives, ….

Bake breads at about 385 deg F until golden brown on top and slightly brown on bottom (approximately 20 – 40 min. depending on size, thickness and quantity in oven)

Cool on racks.

Enjoy!


Made-a-Move Monday #1

בס”ד

I did it!!  I made a move!!

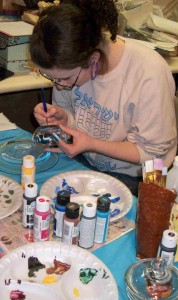
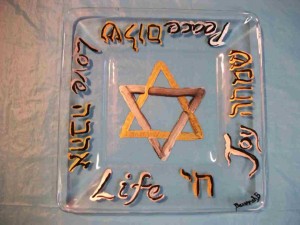
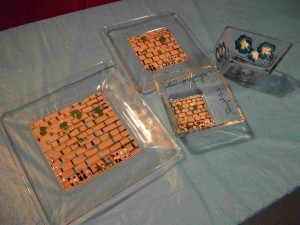
It wasn’t easy to break out of my habitual “would-could-should” rut and life in ‘side-tracked city’.  But, with the help of my commitment to “Made-a-Move Mondays” and getting my daughter to pull me into my workshop… “Are you coming soon?”…

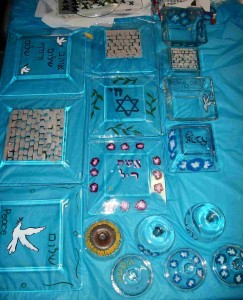
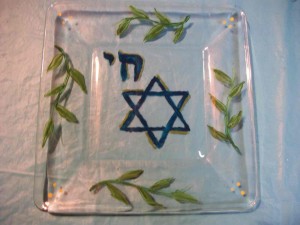
Granted she had to pull me away from my distractions by showing me that she already made this: Ok, in the time it took me to make this:

My daughter made:

In a failed attempt to be helpful (???) someone we showed our accomplishments to afterwards advised me to “do what you are best at, coming up with designs and ideas, and let your daughter do the painting.”

Jaw drop.

Ok.  I know I need more practice.  Yes, I know art flows from my daughter’s hands as naturally as 6-strand challah (bread) braids flow from mine. (Ok – yes, she can do that too!!).

Looking past the surprising delivery and timing of the comment, I can consider ‘Was their unsolicited advice true?’  Maybe yes and maybe no – I know I have done much better pieces in the past (I have been painting glass plates about once or twice a year for the past several years) and that I am capable of doing much better.  It’s been a long time – this was just getting my feet wet again.  I love to share artistic ideas with my daughter and take great pleasure in watching her turn them into things spectacular beyond my imagination.  A very big part of my dreams is to share the crafty things I like to dabble in with others and be a catalyst for them to soar with them.

But, the most essential point was completely missed by the meant-to-be adviser – I made a move!!  I took dreams I started several years ago, materials I bought several months ago, and a design I sketched out several weeks ago and put them into action.   I then went on and started on another idea I’ve been developing:

It’s a start.  Small.  But, tangible!  And I am eager to do more… to keep the ball rolling.  And, this time, with the help of my commitment to YOU in ‘Made-a-Move Mondays’, I really think I will.
Thank you, Darren Hardy, for the great advice!
And, Thank YOU for keeping me to my commitment!
Lets continue to grow and blossom together!

- DebBee